
Expert Scorecard Guide
Building Expert Scorecard by Scorport Methodology
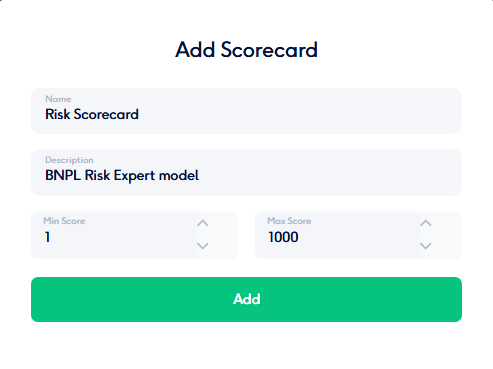
This guide provides a step-by-step demonstration of how to build Expert Scorecards using the Scorport Platform. With Scorport's innovative methodology, you can design, fine-tune, and implement scorecards tailored to your specific needs, transforming your data into actionable decision models.
Steps to Build Expert Scorecard:
The model presented here was created using AI in line with Scorport's Methodology and has been added to the platform solely as a sample for demonstration purposes.
Step 1. Add Categories:
Categories are the foundation of your scorecard, grouping related criteria under a common theme. In this step, you will create Categories and assign them appropriate weights to define their overall influence on the final score.
-
- Click "Add Category" to define the main groups of data for your scorecard.
- Assign a weight (%) to each category. The total weight of all categories must sum to 100%.
- If the total weight is less than 100%, the system will automatically allocate the remaining percentage to a Default Deficit Category.
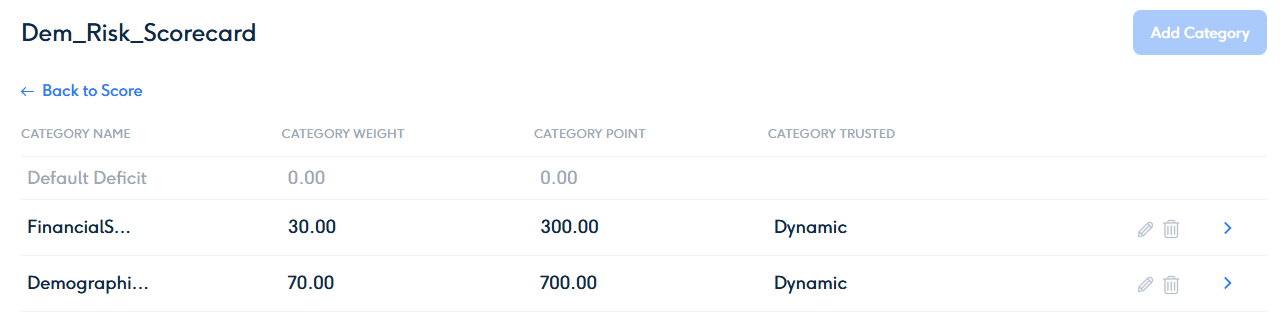
Example:
- Category 1: Demographic Data - Weight = 60%
- Category 2: Financial Stability - Weight = 40%
- Default Deficit Category: Weight = 0% (if total is 100%).
Step 2: Add Criteria for Each Category
Criteria represent the individual variables or features within each category. These define the specific aspects of the data that will contribute to the scorecard’s calculation. Each criterion is assigned a weight within its category, ensuring it reflects its relative importance.
Steps to Add Criteria:
-
Select a Category:
- Navigate to the Categories section within your new scorecard.
- Choose the category to which you want to add criteria.
-
Add Criteria:
- Click "Add Criterion" under the selected category.
- Provide a name and optional description for the criterion to explain its purpose.
- Assign a weight (%) to the criterion within the category. The total weight of all criteria in the category must equal 100%.
-
Choose the Criterion Type:
- Range Type: Use when the variable has a minimum and maximum range (e.g., age, income).
- Variable Type: Use when the variable represents distinct values (e.g., employment status, marital status).
Example:
-
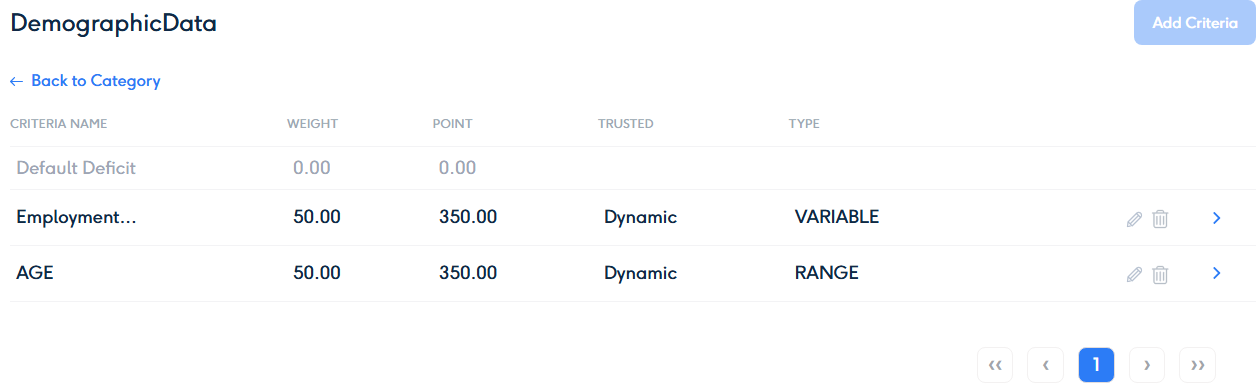
Category: Demographic Data
- Criterion 1: Age (Range Type) - Weight = 50%
- Criterion 2: Employment Status (Variable Type) - Weight = 50%
-
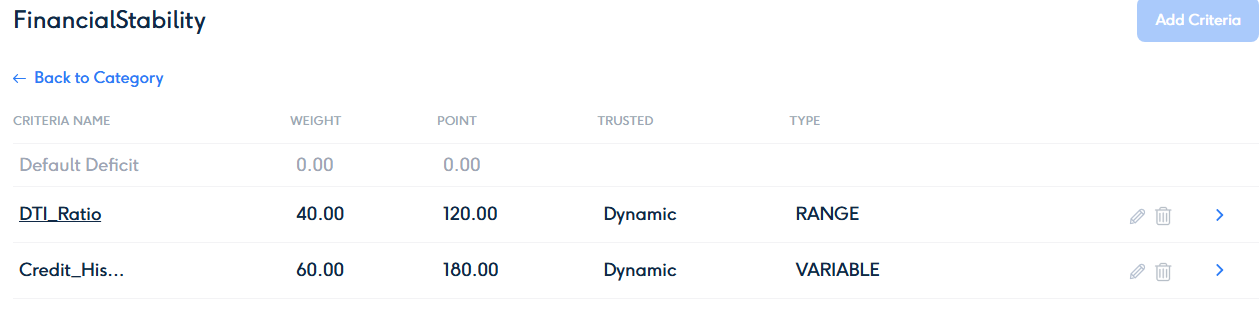
Category: Financial Stability
- Criterion 1: Credit History (Variable Type) - Weight = 60%
- Criterion 2: Debt-to-Income Ratio (Range Type) - Weight = 40%
For Demographic Data Category
For Financial Stability Category
Step 3: Add Attributes (Bins) for Each Criterion
Attributes, also known as Bins, represent the specific ranges or values within each criterion. These bins define how different levels of the criterion will impact the overall score, allowing for detailed and precise scoring.
Steps to Add Attributes (Bins):
-
Select a Criterion:
- Navigate to the Criteria section within the category.
- Choose the criterion for which you want to add attributes.
-
Add Attributes:
- Click "Add Attribute" under the selected criterion.
- Define the range or value of the attribute:
- Range Type: Specify the minimum and maximum values for range-based criteria (e.g., Age: 18-30).
- Variable Type: List specific discrete values for non-range criteria (e.g., Employment Status: Full-Time, Part-Time).
- Assign an impact percentage to each attribute, reflecting its contribution to the final decision score.
- Ensure that at least one attribute within the criterion has an impact of 100%, representing the highest relevance.
-
Fine-Tune Impacts:
- Adjust the impacts of attributes to align with your scoring strategy.
- The system will calculate the relative contribution of each attribute to the total score based on these impacts.
Example:
-
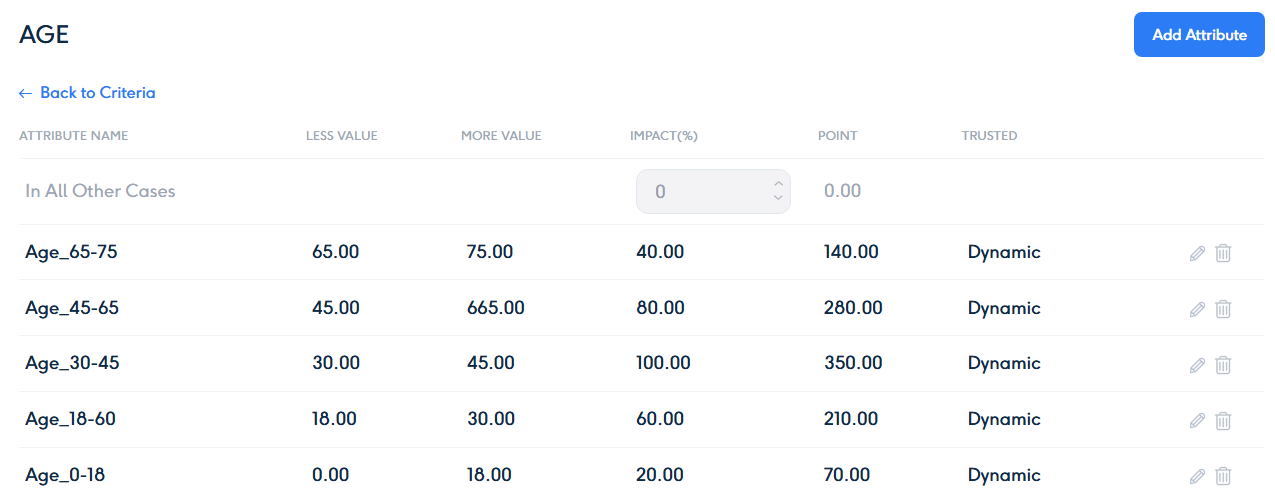
Criterion: Age (Range Type)
- Attributes (Bins):
- 0–18: Impact = 20%
- 18–30: Impact = 60%
- 30–45: Impact = 100% (best range)
- 45–65: Impact = 80%
- 65–75: Impact = 40%
- Attributes (Bins):
-
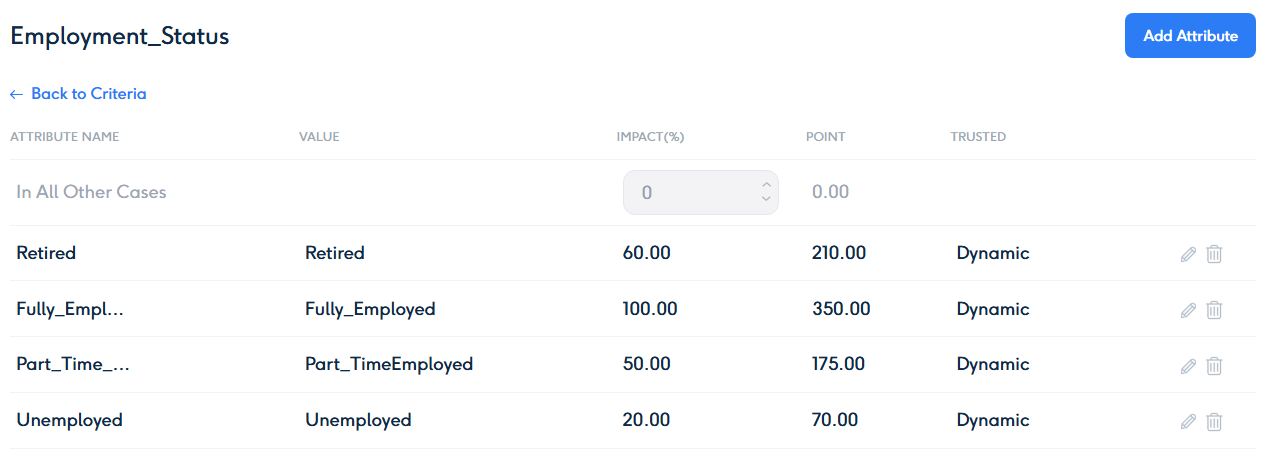
Criterion: Employment Status (Variable Type)
- Attributes (Bins):
- Unemployed: Impact = 20%
- Part-Time: Impact = 50%
- Full-Time: Impact = 100% (best value)
- Retired: Impact = 60%
- Attributes (Bins):
By carefully defining and assigning impacts to attributes, you ensure that your scorecard reflects accurate and actionable scoring logic.
Adding Atributes for AGE criteria and their impact percentage (Sample of Range type Creteria)
Adding Atributes for Employment Status criteria and their impact percentage (Sample of Variable type Creteria)
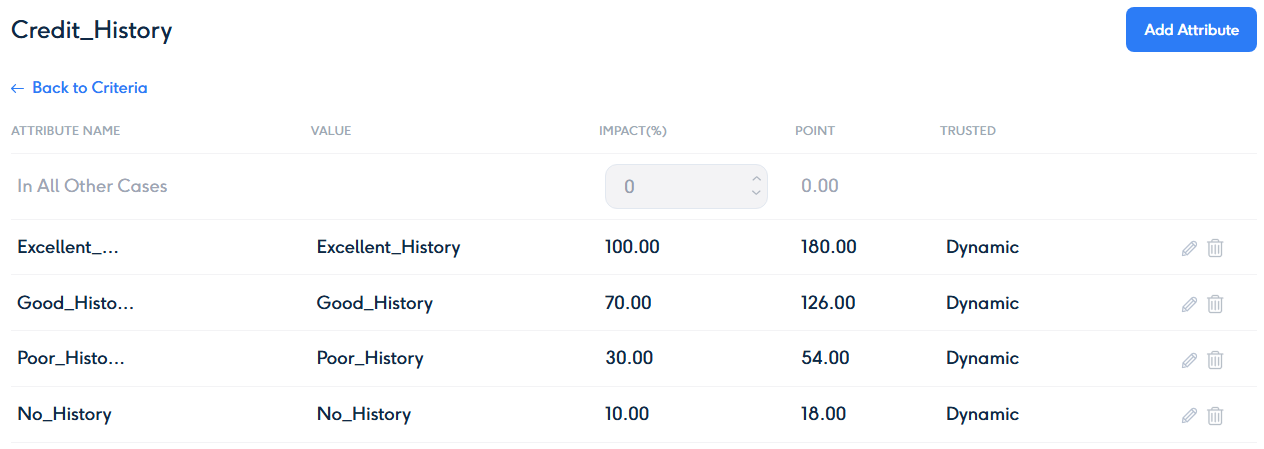
Adding Atributes for Credit History criteria and their impact percentage (Sample of Variable type Creteria)
Adding Atributes for Debt to Income criteria and their impact percentage (Sample of Variable type Creteria)

In Scorprt Platform models in every ranges Right side is included. (18, 30] - here 18 is not included in this range, but 30 yes.
Range Inclusion in Scorport Platform
In the Scorport Platform, ranges are defined with a right-inclusive and left-exclusive notation. This means that the lower bound of the range is not included, while the upper bound is included. For example:
- (18, 30]:
- 18 is not included in the range.
- 30 is included in the range .
This convention ensures clarity and consistency when defining Attributes (Bins) for scorecards. Be mindful of this rule when setting ranges to avoid overlapping or unintended gaps in your criteria. Let me know if you'd like further clarification or examples!

